(2021/10/19 更新)
ラベルとアクションを持つButtonの使い方を解説します。
環境
この記事の情報は次のバージョンで動作確認しています。
【Swift】5.5
【iOS】15.0
【macOS】Big Sur バージョン 11.6
基本的な使い方
次のようにアクションとラベルと指定してボタンを作成します。
|
1 2 3 4 5 6 7 |
Button(action: { // ボタンがタップされた時のアクション }) { // ラベルとして表示するView } |
アクションとラベルは、クロージャーの代わりにメソッドとViewでも指定できます。
|
1 2 3 |
Button(action: アクションメソッド, label: ラベルView) |
使用例
|
1 2 3 4 5 6 7 8 9 10 11 12 13 14 15 |
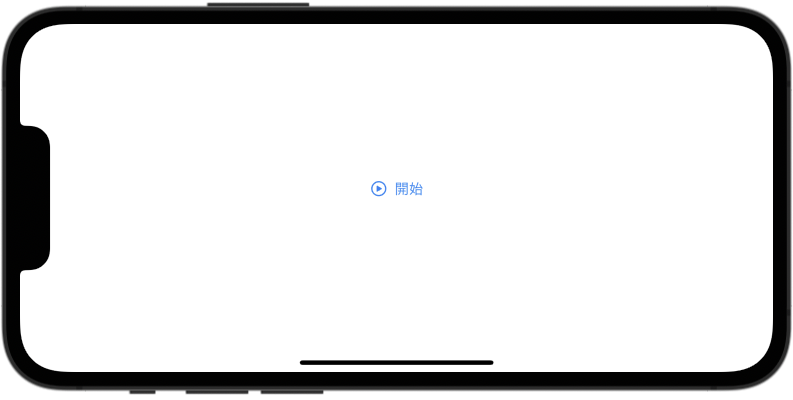
struct ContentView: View { var body: some View { Button(action: { print("タップされました") }) { HStack { Image(systemName: "play.circle") Text("開始") } } } } |
テキストのみのボタン
テキストのみの簡単なボタンは、テキストを最初のパラメータとして受け取るイニシャライザも使用できます。
こちらの方がコードがすっきりしますね。
|
1 2 3 4 5 |
Button("テキスト") { // ボタンがタップされたときのアクション } |
または
|
1 2 3 |
Button("テキスト", action: アクションメソッド) |
使用例
|
1 2 3 4 5 6 7 8 9 10 |
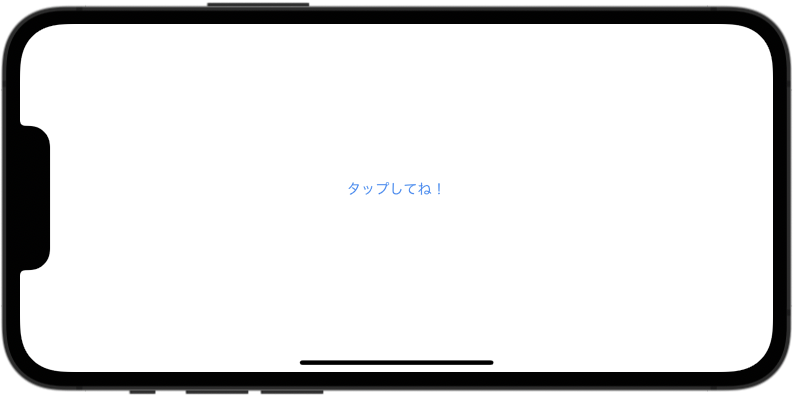
struct ContentView: View { var body: some View { Button("タップしてね!") { print("タップされました") } } } |
ボタンに役割を付加する
roleパラメータでボタンに役割(ButtonRole)を付加できます。
環境に応じて役割に応じた表示スタイルになります。
|
1 2 3 |
Button(role: ButtonRole?, action: アクションメソッド, label: ラベルView) |
または
|
1 2 3 |
Button("テキスト", role: ButtonRole?, action: アクションメソッド) |
【引数】
role
ボタンの役割(roll)をButtonRole構造体で指定します。
nilの場合は、ボタンに役割が割り当てられていない状態の、デフォルト表示になります。
| role | 意味 |
|---|---|
| .cancel | 操作をキャンセルするボタン |
| .destructive | 破壊的なボタン |
使用例
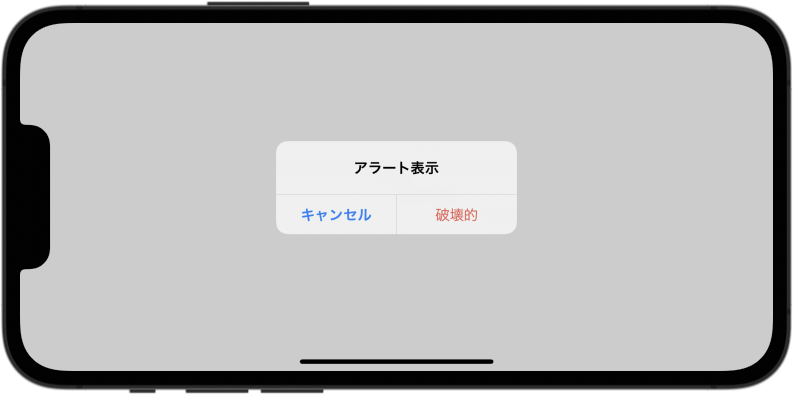
アラートで使用した場合、「破壊的ボタン」は赤色で、「キャンセルボタン」は太文字で常に左側に表示されます。
|
1 2 3 4 5 6 7 8 9 10 11 12 13 14 15 16 17 18 |
struct ContentView: View { @State private var showingAlert = false var body: some View { Button("アラート表示") { showingAlert.toggle() } .alert("アラート表示", isPresented: $showingAlert) { Button("破壊的", role: .destructive) { print("破壊的ボタンが押された!") } Button("キャンセル", role: .cancel) { print("cacelボタンが押された!") } } } } |
ボタンのスタイルを指定する
次のモディファイアでボタンのスタイルを指定できます。
|
1 2 3 |
.buttonStyle(定義済スタイル) |
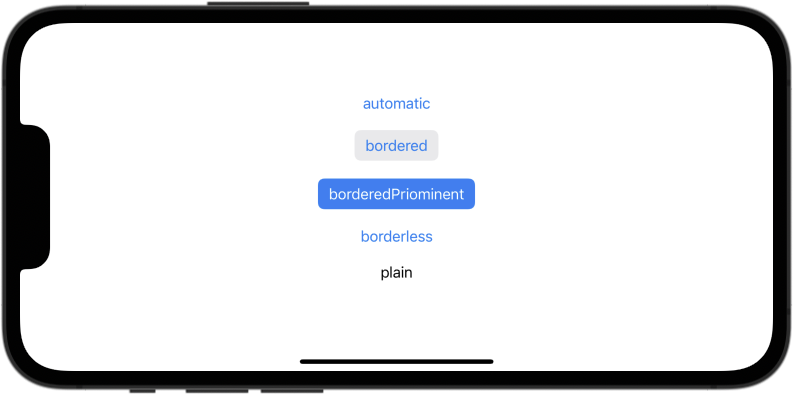
システムで用意されているスタイルには以下のものがあります。
.automatic
環境によって推奨されるスタイルが自動で選択されます。
デフォルトで設定されるスタイルです。
.bordered
標準の境界線アートワークを適用します。
※iOS15から使用可能になりました。
.borderedProminent
標準の境界線の目立つアートワークを適用します。
※iOS15から使用可能になりました。
.borderless
境界線を適用しないボタンスタイル。
.plain
装飾無しのボタンスタイル。
表示例
実際に表示されるデザインは使用される環境によって変わります。
|
1 2 3 4 5 6 7 8 9 10 11 12 13 |
struct ContentView: View { var body: some View { VStack(spacing: 20) { Button("automatic", action: {}).buttonStyle(.automatic) Button("bordered", action: {}).buttonStyle(.bordered) Button("borderedPriominent", action: {}).buttonStyle(.borderedProminent) Button("borderless", action: {}).buttonStyle(.borderless) Button("plain", action: {}).buttonStyle(.plain) } } } |
iOS13.Xでラベルに画像を使う場合の注意点
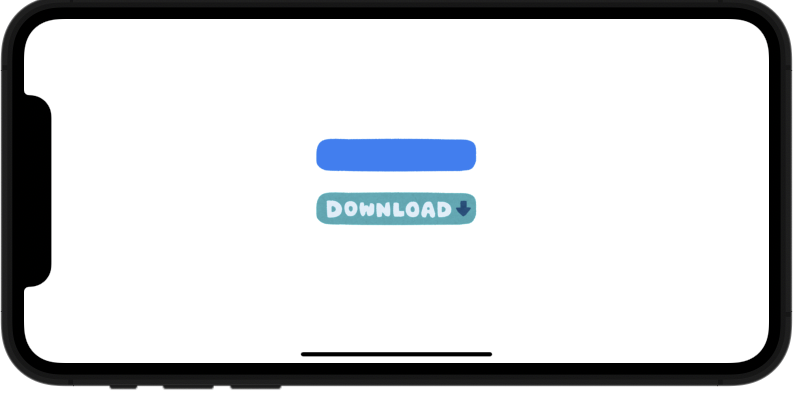
Buttonのラベルに指定したテキストは、通常 .accentColor (デフォルトは青)で表示されますが、iOS13.XではラベルにImage(画像)を指定した場合も .accentColor で塗りつぶされてしまいます。
次のモディファイアを付加すると、オリジナルの色調で表示が可能です。
|
1 2 3 |
.renderingMode(.original) |
iOS14以降では、本モディファイアが無くてもオリジナル色調で表示されるようになりました。
|
1 2 3 4 5 6 7 8 9 10 11 12 13 14 15 16 17 18 19 20 21 22 23 24 |
struct ContentView: View { var body: some View { VStack(spacing: 20) { /// iOS13.Xでは青一色で表示される Button(action: { print("ボタン1が押された!") }) { Image("button_download2") .resizable() .scaledToFit() .frame(width: 200) } /// iOS13.Xでもオリジナル色調で表示される Button(action: { print("ボタン2が押された!") }) { Image("button_download2") .renderingMode(.original) .resizable() .scaledToFit() .frame(width: 200) } } } } |
あわせて読みたい記事


