(2020/11/30 更新)
1画面内で複数のアラートを使い分ける方法を解説します。
環境
この記事の情報は次のバージョンで動作確認しています。
【Xcode】12.2
【Swift】5.3.1
【iOS】14.2
【macOS】Catalina バージョン 10.15.7
【Swift】5.3.1
【iOS】14.2
【macOS】Catalina バージョン 10.15.7
やりたい事
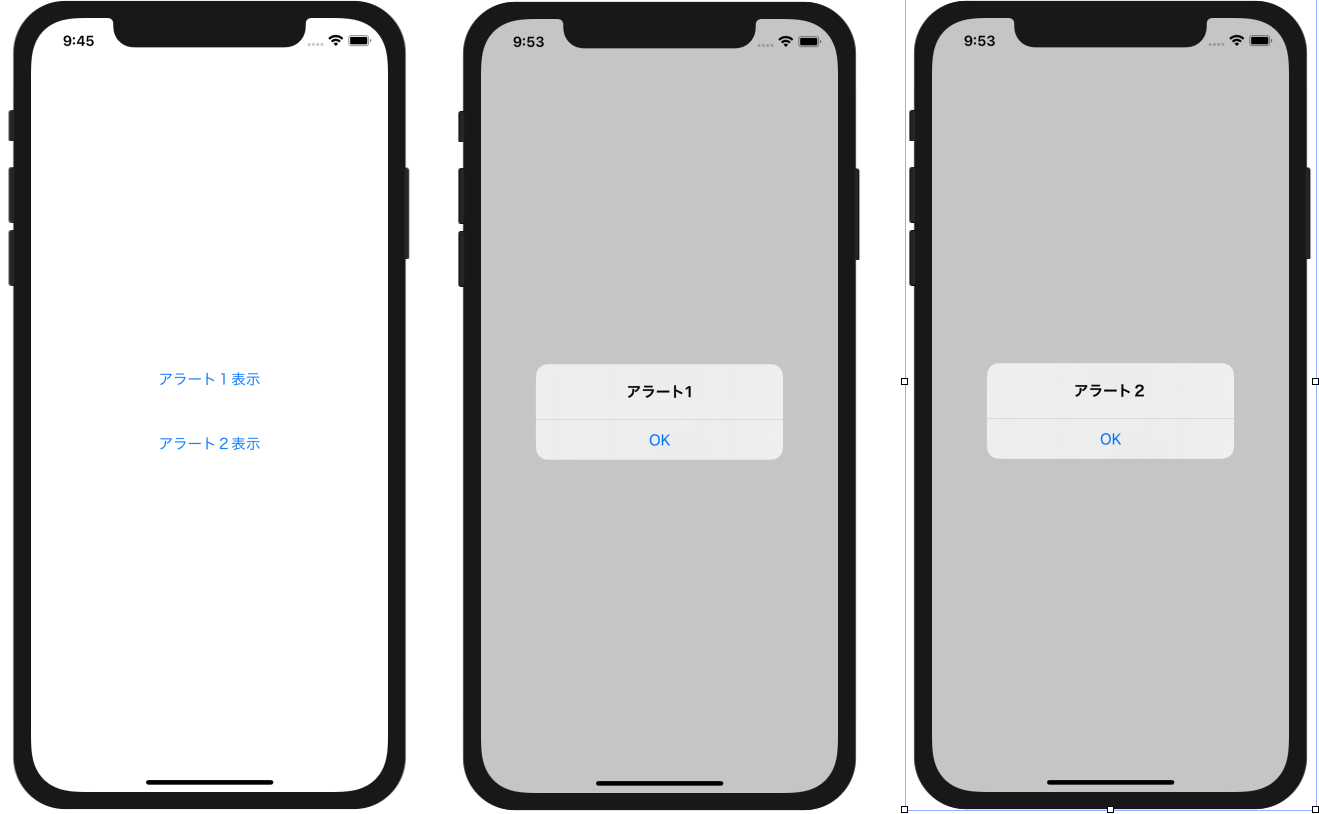
2種類のボタンをタップして、各々別のアラートを表示させます。
間違った方法
次のコードはコンパイルエラーこそ発生しませんが、想定通りには動きません。
2つ目のalertモディファイアが1つ目を上書きしてしまう為、「アラート1表示」をタップしてもアラートが表示されません。
|
1 2 3 4 5 6 7 8 9 10 11 12 13 14 15 16 17 18 19 20 21 22 23 |
struct ContentView: View { @State private var showingAlert1 = false @State private var showingAlert2 = false var body: some View { VStack(spacing: 50) { Button("アラート1表示") { showingAlert1 = true } Button("アラート2表示") { showingAlert2 = true } } .alert(isPresented: $showingAlert1) { Alert(title: Text("アラート1")) } .alert(isPresented: $showingAlert2) { Alert(title: Text("アラート2")) } } } |
方法1:親子関係に無いViewに別のアラートを定義する
次のコードのようにalertモディファイアを各々のButtonビューに定義すると、2種類のアラートが想定通り表示されます。
注意点として「親子関係に無いView」に分けて定義する必要があります。
親子関係のあるViewに分けて定義した場合は、最初の例のように定義が上書きされてしまいます。
|
1 2 3 4 5 6 7 8 9 10 11 12 13 14 15 16 17 18 19 20 21 22 23 |
struct ContentView: View { @State private var showingAlert1 = false @State private var showingAlert2 = false var body: some View { VStack(spacing: 50) { Button("アラート1表示") { showingAlert1 = true } .alert(isPresented: $showingAlert1) { Alert(title: Text("アラート1")) } Button("アラート2表示") { showingAlert2 = true } .alert(isPresented: $showingAlert2) { Alert(title: Text("アラート2")) } } } } |
方法2:動的にアラートを生成する
alertモディファイアのもう一つのイニシャライザを使用すると、アラートを動的に生成できます。
|
1 2 3 4 5 |
.alert(item: 状態オブジェクト) { itemを引数にAlertを生成する処理 } |
引数(item)で指定した状態オブジェクトがnilでない場合に、クロージャーに定義した処理が実行されてアラートを表示します。
状態オブジェクトの型は開発者が任意に定義しますが、Identifiableプロトコルに準拠している必要があります。
次のコードは、状態オブジェクト(AlertItem)にセットするAlertオブジェクトを変えて、動的にアラートを切り替えます。
|
1 2 3 4 5 6 7 8 9 10 11 12 13 14 15 16 17 18 19 20 21 22 23 24 |
struct ContentView: View { @State private var showingAlert: AlertItem? var body: some View { VStack(spacing: 50) { Button("アラート1表示") { showingAlert = AlertItem(alert: Alert(title: Text("アラート1"))) } Button("アラート2表示") { showingAlert = AlertItem(alert: Alert(title: Text("アラート2"))) } } .alert(item: $showingAlert) { item in item.alert // 状態オブジェクトにセットされたAlertオブジェクトを返します } } // 状態オブジェクトの型 struct AlertItem: Identifiable { var id = UUID() var alert: Alert } } |
あわせて読みたい記事

(アーカイブ)【SwiftUI】アラートの使い方(alert)
(2020/8/13 更新) 本記事の説明はiOS14以前の使用方法です。iOS15以降の情報はこちらの記事を御覧ください。 ユーザーに確認を促すアラートダイアログを表示する、.alert()の使い方について解説します。

【SwiftUI】Modifierの適用順
Viewに様々な変更を適用するModifierですが、適用する順番によって挙動が変わる事があります。 これはModifierが既存のViewのプロパティを変更しているのでは無く、変更を適用した新しいViewを毎回作成している事に関係します。


