storyboardにViewControllerを追加する方法を解説します。
新規プロジェクト作成時にデフォルトで存在するViewControllerには、始めからクラスファイル(ViewController.swift)が関連付けられていますが、後からViewControllerを追加する場合は、自分で関連付けをする必要があります。
環境
この記事の情報は次のバージョンで動作確認しています。
【Xcode】10.2
【Swift】5.0
【iOS】12.2
【macOS】Mojave バージョン 10.14.4
【Swift】5.0
【iOS】12.2
【macOS】Mojave バージョン 10.14.4
ViewContoller部品の追加
次の手順でstoryboardにViewController部品を追加します。
- ①Libraryボタンをクリック。
- ②部品リストが開くので、
- ③ViewControllerを選んでstoryboardにドラッグします。
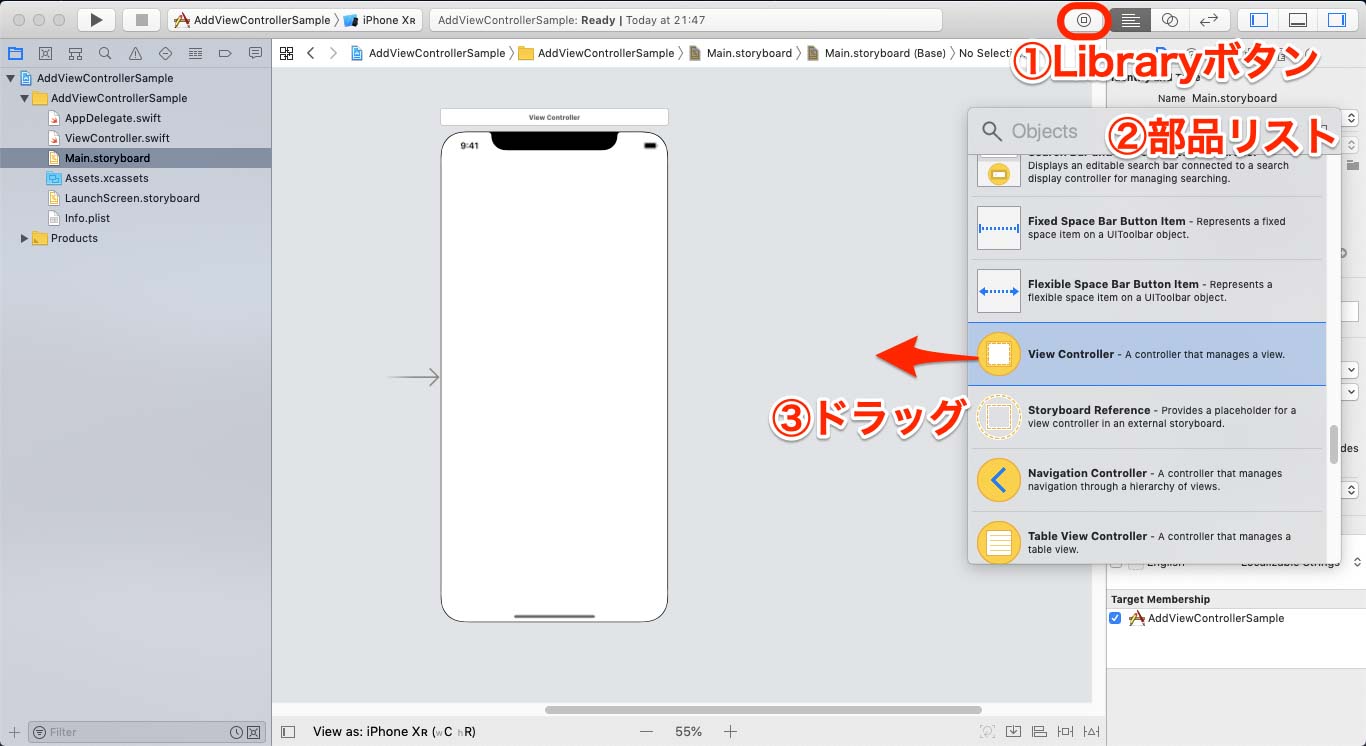 (画像をクリックで拡大します)
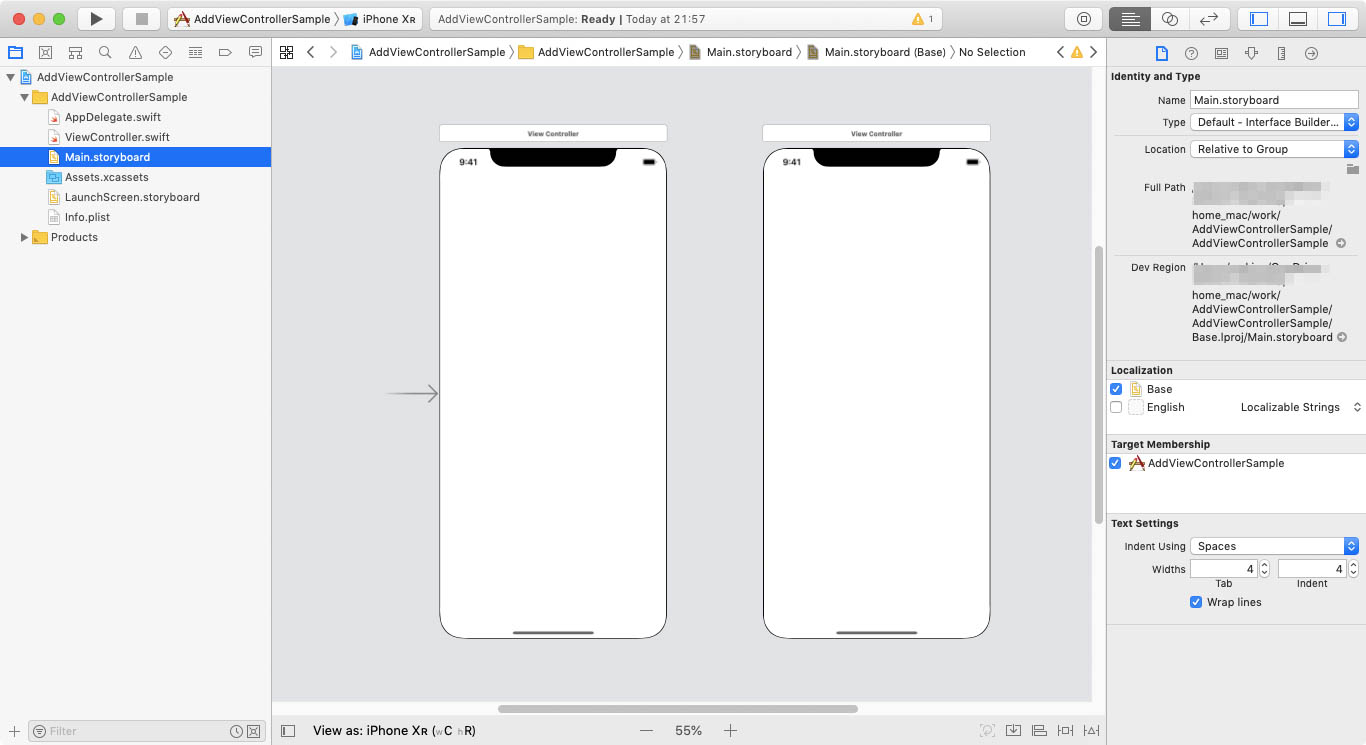
新たなViewControllerがstoryboardに追加されました。
 (画像をクリックで拡大します)
クラスファイルの追加
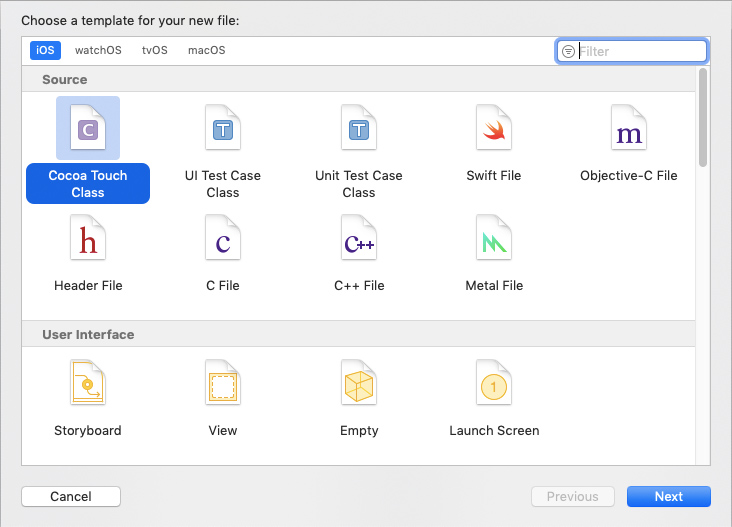
メニューからFile>New>File...を選択。
テンプレート選択メニューが開くので、「Cocoa Touch Class」を選択して「Next」をクリック。
 (画像をクリックで拡大します)
追加したViewControllerに付けるClass名を入力します。
SubclassにはUIViewControllerを選択します。
「Next」をクリックすると、ファイルの作成場所を聞いてくるのでそのまま「Create」をクリック。
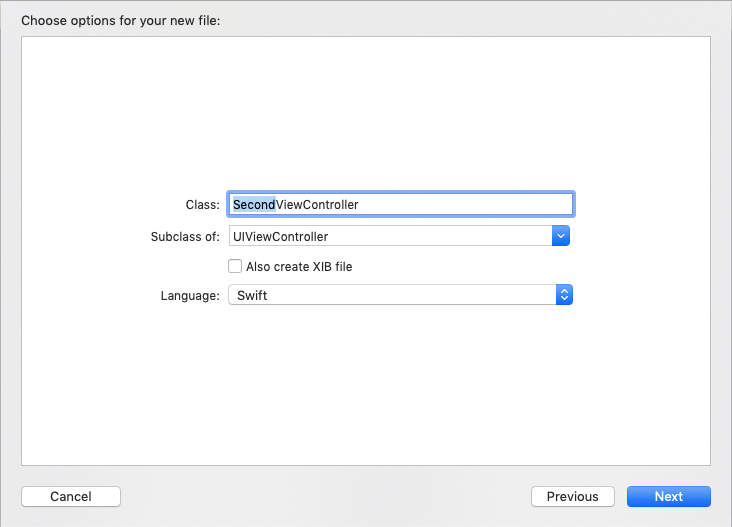 (画像をクリックで拡大します)
画面左のプロジェクトナビゲーターに、追加したクラス(SecondViewController.swift)が追加されました。
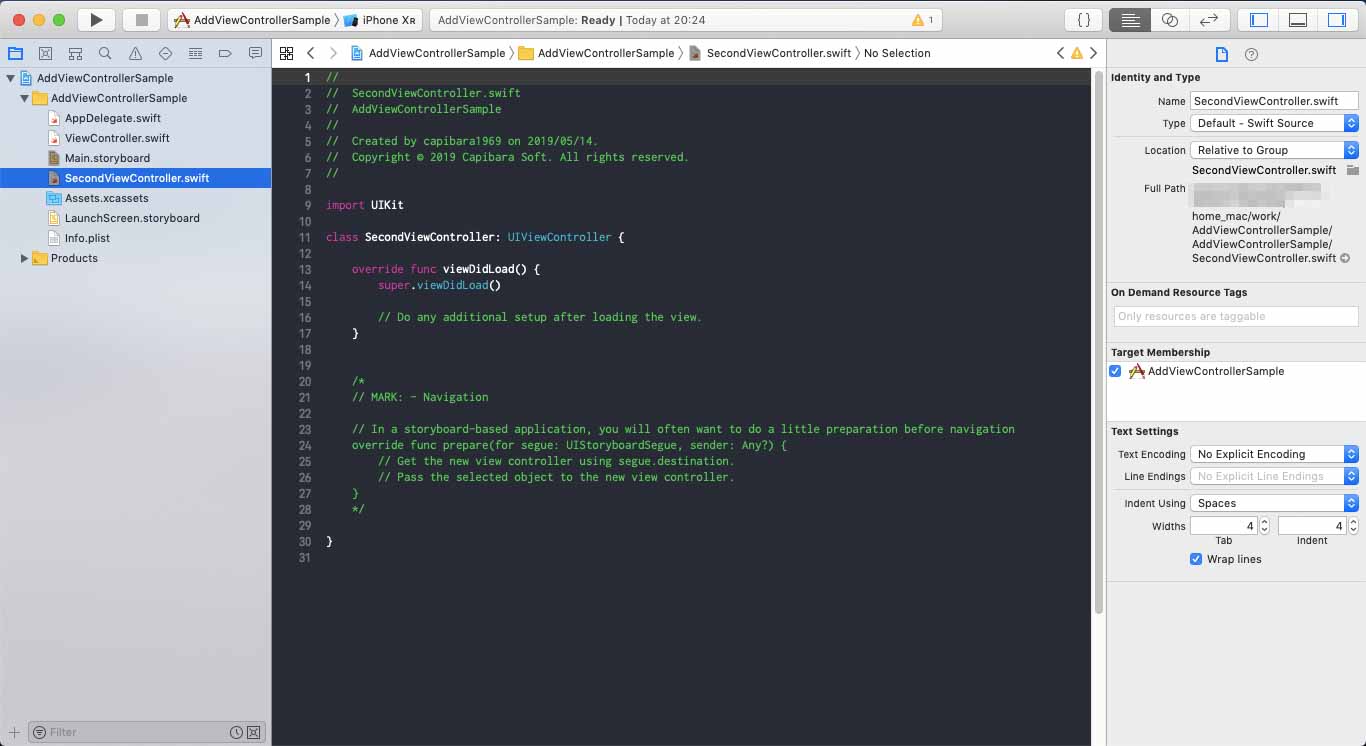 (画像をクリックで拡大します)
部品とクラスファイルの関連付け
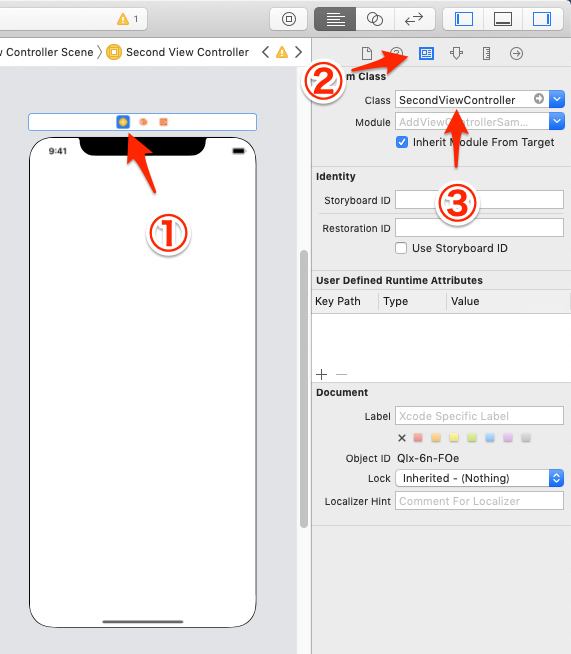
次の手順でViewController部品とクラスファイルを関連付けます。
- ①追加したViewControllerを選択
- ②identity Inspectorをクリック
- ③Classに先程追加したクラス(SecondViewController)を選択
以上で、部品とクラスの関連付けが完了です。
最後に
追加したViewControllerの動作に関するコードは、関連付けられたクラスファイルに記述していきます。

